Two over easy with bacon, July Daring Cooks

•July 13, 2011 • 19 Comments

Two eggs over easy with bacon is a damn fine start to just about any morning. Now how do you change that up with a little technique and a few ingredients to make basically the same thing for a gourmet dinner?

It was seeing two different food postings on the internet in a short amount of time that first planted the seed for this dish. Michael Ruhlman did a post on egg yolk filled ravioli and a friend in an old Myspace group posted a beautiful picture of a roasted pork belly. Inspiration!

This month’s Daring Cooks challenge was make a dish that incorporates hand made fresh pasta. Steph from Stephfood was our Daring Cooks’ July hostess.  Steph challenged us to make homemade noodles without the help of a motorized pasta machine.  She provided us with recipes for Spätzle and Fresh Egg Pasta as well as a few delicious sauces to pair our noodles with!

You have to start this recipe with the pork belly. Basically you cover it with a mix of salt and sugar in equal parts and then let sit overnight. I did mine in a ziploc. You could also wrap it up tight in saran wrap.

Notice how much liquid is released from using this cure overnight. I rinsed thoroughly and patted dry with paper towels. Then it goes into a 250 F oven for about 2-2.5 hours. Baste with it’s own fat every so often and then turn the oven up to 450 F and roast for another 30 minutes or so. Keep an eye on things so that the top doesn’t get too dark.

Set this aside to cool. Then get to work on your pasta.

I do a very rich version of egg pasta using 1 cup of flour, 2 egg yolks, and 1 whole egg. Usually I do this in a mixing bowl and that is how I reccommend everyone does it. This time for photo purposes I did the well method. In my opinion the bowl works better.

One of the most important steps in making fresh pasta is to be sure and allow the kneaded dough to rest. I knead until mostly smooth and then wrap in saran wrap to let rest.

Then roll it out with what you have. I highly reccommend one of these Atlas pasta rollers. They are built to last 100 years and always work.

You need a little bit of filling as a nest for the egg yolks. So I put together a mix of fresh whole milk ricotta, egg, grated parmesan, fresh basil, fresh oregano, grapefruit zest, salt, and pepper.

Lay out a little filling and make a well for the yolks. Then gently put your egg yolk into the well.

Brush around your filling with egg wash and then GENTLY lay over your cover sheet of pasta. Try to work out as much of the air as possible and then seal with your fingertips. Use something as a guide to cut out your shapes. I used a small ramekin.

Now you are ready for the big finish. All at the same time, make a simple sauce of browned butter and some fresh squeezed grapefruit juice, gently boil your ravioli for exactly 2 minutes, and reheat your now sliced pieces of pork belly.

Bada Boom. Tarragon as a little color on top  and it also adds a great anise flavor to this wonderful combination.

The sauce is powerful so just a couple of tablespoons over the pasta is plenty.

I always think of this as the moment of truth. Why yes, the yolk was cooked to perfection.

Try this dish at least once in your life. The components themselves are amazing, but together it takes you someplace better.

 Be sure to check out all the other Daring Cooks posts.

Flying Pig Smoked Chicken Tacos (kinda)

•July 12, 2011 • 4 Comments

I have been fascinated by these crazy fusion food taco trucks popping up all over the country. LA, Austin, NYC, basically everywhere but Anchorage. They combine ingredients, cultures, and cooking styles in ways that surprise and delight.

Well I was looking for an out of the ordinary kind of taco and came across this recipe from the Flying Pig Taco Truck. Smoked chicken, a crunchy slaw, lots of herbs, this was right up my alley.

Now while my attempt was inspired by their recipe, I did not follow it to the letter. I started with the chicken. I had marinated some thighs in soy, chile sauce, ginger, garlic, and sesame oil. I hot smoked them on my propane grill with apple wood chips. These took almost 2 hours and went through two pans of chips.

I skipped the whole braising liquid step suggested by Flying Pig. I am sure it is good but these thighs were just about perfect already and I saw no need to mess with them further.

Next up was the slaw. I used what was available to me. Red cabbage, carrot, red bell pepper, poblano peppers, Thai chiles, mint, cilantro, basil, orange juice, rice vinegar, salt, pepper, and  sugar.  I like a drier slaw so I went easy on the OJ and rice vinegar. Basically combine the ingredients and then season to your taste. Oh, I also tossed in some pistachios just because they were in the kitchen and I love them.

Last but not least was the green curry sauce. I basically followed their recipe. I sauteed grated ginger, Thai chiles, garlic, and lemongrass. That was then tossed in the food processer and buzzed up with cilantro, egg white, peanut oil (I didn’t have canola), rice wine vinegar, cumin, and just a little honey. Everything is put in the food processor except for the oil which is drizzled in slowly to form a smooth green sauce.

Now to assemble. I tried both soft yellow corn tortillas and also fried crispy white corn tortillas. I definitely preferred the crispy version. In the fusion spirit of these little snacks, I dressed them with sriracha.

These are definitely not a traditional taco. They are however absolutely delicious. Well worth a little effort.

Gumbo Two Ways, May Daring Cooks

•May 14, 2011 • 20 Comments

Aww yeah, we gonna get our gumbo on this month.

Our May hostess, Denise, of There’s a Newf in My Soup!, challenged The Daring Cooks to make Gumbo! She provided us with all the recipes we’d need, from creole spices, homemade stock, and Louisiana white rice, to Drew’s Chicken & Smoked Sausage Gumbo and Seafood Gumbo from My New Orleans: The Cookbook, by John Besh.

I have loved gumbo ever since being introduced to it almost 20 years ago. You might not associate gumbo with Alaska but it fits right in up here. Wild game and and an abundance of amazing seafood are two key reasons Alaskans are so connected to those down on the Gulf.

When the challenge first posted I wanted to do something unique but still true to the spirit of such a great dish. It just so happens that my ‘Uncle Carl’, who we lovingly refer to as El Poacho, had sent up several batches of teal ducks that he had come across. So the plan developed from there. I was going to make a wild smoked duck and andouillie gumbo.

I soaked two ducks in orange juice for about 3 days. This helped get rid of some of the strong wild taste and blood.  These ducks have a strong mineral flavor that needs some mellowing and the marinading was the perfect solution. I then rinsed, dried, and rubbed with a dry rub of spices consisting of traditional creole seasonings; thyme, hot paprika, cayenne, salt, brown sugar, onion powder, garlic powder, and black pepper.

Everything was set up on my new rotisserie attachement for the Weber propane grill with a smoking hot pan of apple wood chips.

I let these go for about 90 minutes at between 275F-300F. Even though wild ducks are much leaner than domestic, no basting was neccessary.

These were taken inside and allowed to cool before all the meat was picked from the carcass.

While those were cooking, I got to work drinking. Oh wait, I mean I got to work on the roux. I dug in to my secret stash of duck fat for this one.

If you have never used duck fat for cooking, you are missing out. So with a beer in one hand and a whisk in the other, I got to stirring in the flour to color the roux.

This was taken off the heat and allowed to slowly cool down. Don’t stop stirring while it is cooling though. As the cast iron retains heat for quite some time, you have to continue stirring until the pot is cool. This also keeps your roux from separating.

It was now getting late and so the last thing I did was get my stock together. The smoked carcasses, a smoked chicken carcass, and a bunch of chicken wing tips I had been saving went into the stock pot. Along with the bird parts went carrots, onion, celery, garlic, bay leaves, thyme, parsley, and lots of peppercorns. This was set on the stove over very low heat and allowed to go overnight.

I sleep like a baby any time I have stock on the stove overnight. So now on day two, I cool, filter, and defat the smoked duck stock. Then I pull together the mis en place.

This consisted of onion, celery, red bell pepper, green bell pepper, jalapeno, garlic, andouillie sausage, ham, picked smoked duck, duck fat roux, fresh herbs, spices, and frozen okre.

My order of operations here differs from most recipes. I start by browning up the sausage and ham in some olive oil. This gets pulled out and in goes the onion. Then I put in the peppers and celery with the onion and allow everything to get some color. Then finally the garlic and the roux are tossed in. I do this because I don’t like the roux sticking to the pot and burning. I then pour in a bunch of stock, probably about 2 quarts and then all the meat, bay leaves, picked thyme, hot paprika, tabasco, worcesteshire, cayenne, salt, and pepper. I like some heat and spice to my gumbo especially with so many strong flavors, BUT, don’t overdo it. You want the heat to compliment your dish, not overpower it.

I let this simmer on the stove for about an hour and then tossed in the okre. Then another 20-25 minutes at a low simmer to let thicken.

I serve simply with some plain old white rice. Put on some green onion for color and some hot sauce if you like. Smoked teal gumbo, DONE!

Delicious fo sho.

I finished the above about halfway through the month. Then went on an epic camping trip to Seldovia. This is a small fishing community only reachable by boat or airplane. We camped just off the beach and I even took a dip in the freezing ass ocean. Great times for sure.

Upon re-entry, I realized it just wouldn’t be right if I didn’t do an Alaskan seafood gumbo for the challenge. I mean really.

So I started thinking about what I was going to use. Crab would be too obvious and I was looking for something even more special. So I hit the best fish market in town and ended up grabbing some rockfish and spot prawns. Both were harvested probably less than 200 miles from my house.

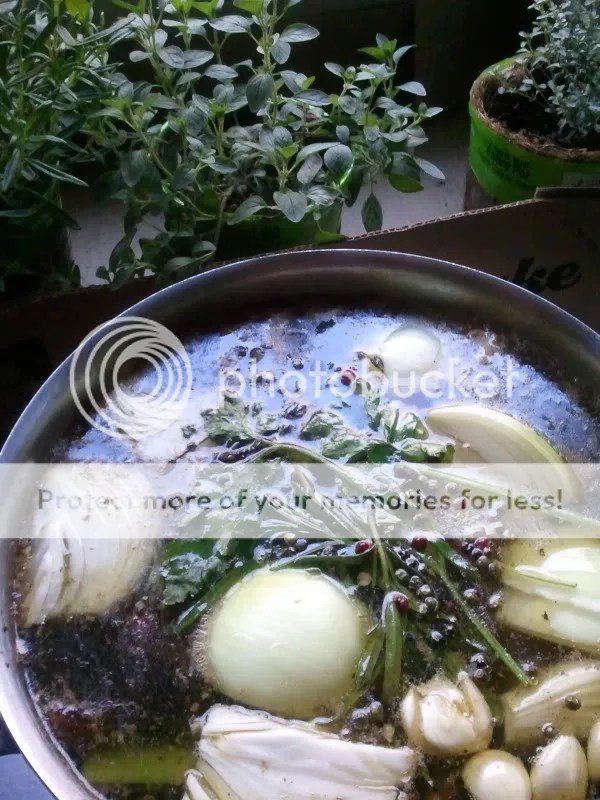
So again I got started on some stock. This time it was the shrimp shells and fish carcasses along with carrot, celery, onion, bay leaves, thyme, parsley, garlic, lemon slices, and peppercorns. I first added a dry white wine and allowed it to reduce by about half. Then everything was covered by about an inch of cold water. This was brought to a low simmer and allowed to cook for about 45 minutes.

Isn’t that a pretty pot? It gave off an amazing stock too.

So another roux, more mis en place, and everything but the fish and shrimp went into the pot. This time I only added one link of andouillie, and only one jalapeno so as not to overpower the more mild seafood flavors.

I did have one little trick left up my sleeve to put this over the top. Buried in the bottom of my freezer was a very special vaccuum sealed package. Nothing but halibut cheeks. Almost 2 lbs. of the things. Some of them as big as my palm (those were from some very large halibut). I seasoned these simply with some salt, pepper, and the same seasoning mix used on the ducks from above. They were then hard seared for just about a minute on either side in a cast iron skillet with some butter and olive oil.

It all came together pretty quick. The shrimp and rockfish pieces were tossed in at the very end. This time I did use some of the fish stock to make the rice. It helped carry that beautiful fresh seafood flavor through the whole dish.

Served with the seared cheeks on top.

I will be eating more of this while reading everyone elses posts. Thanks again Denise. What a great challenge.

Be sure to check out the other Daring Cook’s take on this challenge. Blogroll

HOT POCKETS! April Daring Cooks

•April 13, 2011 • 26 Comments

I bet you didn’t see that coming. In my younger days, I have eaten a few of those nasty things cooked in a plastic sleeve in your tiny little microwave. Well these are more in the tradition of a Cornish pasty, as opposed to something you would buy in the freezer section. In fact I was messing around with a classic Cornish pasty when I came up with the idea for this. A great stand up comic routine by Jim Gaffigan on the very subject set me in motion.

You gotta check out this video that inspired me. 😉


 You see, this month’s challenge was for an edible container. Basically that was all the instruction we were given. It left things wide open to interpretation. I got off to a quick start by doing a classic French onion soup served in a sweet onion.

That little bit of soup right there was at least 2 days of cooking. A proper beef stock starting with soup bones takes time. In the end though the container was just in the way. The soup kicked ass but was much, MUCH better in a regular bowl.

I then got started playing around with the Cornish pasties. I used a very traditional recipe for the pastry. 2 parts flour, 1 part butter/lard, and some salt that is cut together with a pastry cutter. It is then brought together with some cold water. Basically it is a recipe my Mom taught me for peach cobbler crust. Only difference is she uses butter flavored Crisco. I am of the opinion that lard and high fat Irish butter makes a better tasting anything.

When you get it to this stage, you start adding ice cold water. Most recipes say to add a Tblsp at a time. That takes forever. I just added about a 1/8th cup to 8oz of flour and 4oz of fat.

Just mix it around with one hand and gently push it together. You aren’t trying to knead it. Just bring it together in a ball. I am of the opinion that a little moist is better than a little dry. When you go to roll out the pastry you will thank me for that tip.

Wrap up the ball in some plastic and refrigerate for at least 30 minutes. Pull it out and divide into 4ths. Roll out into about 6-7 inch circles. I polished them up a bit by using a plate to cut them nice and round.

After rolling.

The filling can be just about anything you want. For the Cornish version I went with sliced skirt steak, rutabaga, potato, and onion that I seasoned heavily with kosher salt and fresh cracked pepper. They tasted amazing. After talking with someone in the know about Butte Montana style pasties, I tried a version covered in a kind of beef gravy. It was actually demi-glace with some beef stock to thin just a bit.

Not real pretty but damn was it tasty.

Now on to the Hot Pockets (sung just like Gaffigan does in the video). I decided on two versions. A ham, cheddar from Lena Il., and broccoli was first and then a pizza pocket with hot Italian sausage from my butcher, low moisture mozzarella, a couple slices of pepperoni, some grated parmesan, a couple of torn basil leaves, and some marinara I just made.

The marinara was my best ever. Not that I did anything crazy or too different. I just used some new tomatoes and they are really good.

I start by sweating some sweet onion in a big pour of olive oil along with some chile flakes.

I then tossed in two finely minced garlic cloves, two bay leaves,  and stirred it around for a couple of minutes. This is just about the time that the onions start leaving a little color on the bottom of a stainless pot. So deglaze with some of that great cab from the above pic. Cook off almost all the liquid and then pour in your tomatoes. Stir in some fresh oregano and taste for seasoning. I just added some salt and about a 1/2 cup of beef stock. Adding stock or water just allows you to simmer things a little longer without having to hover over the pot to keep it from sticking. This was simmered for about 45 minutes while the pastry dough was resting in the fridge.

Assemble your pockets. I put these together and after taking the photo, added just a Tblsp of sauce.

Just like any sealed dough, you brush the edges of this with eggwash. I added a bit of 1/2 & 1/2 to mine. Then fold over gently and crimp the edges. My first one earlier this month was crazy ugly. These came out much better. I finished the crimp with the tines of a fork.

Resist the urge to overstuff. I always ride that line. Then brush with eggwash and put into a 425 F oven. I used a sheetpan lined with parchment but a greased cookie sheet will work just as well.

These were brushed again after 25 minutes and baked for another 20 for a total of 45 minutes (I even amaze myself with my Einstein like math skills).

Aren’t those pretty? Now I am wondering what they would have looked like without the eggwash.

Plate simply with some of your marinara and a little basil. I put the flower there for the photos but to eat, I actually tore up a bunch of basil because I love the stuff.

 The shortcrust gives off such a great aroma as it gets close to done. I think it is the same smell as a properly browned butter for beurre noisette. The crust was flaky and delicious but I think next time I will leave it a little thicker.

In my opinion, this is a simple dish done well. I used good ingredients and technique to produce a solid tasty dish. When I heat up the broccoli, ham, and cheese version for breakfast, I will update. Be sure to check out all the other Daring Cooks. This month especially they have put out some amazingly creative challenges.

 Renata of Testado, Provado & Aprovado! was our Daring Cooks’ April 2011 hostess. Renata challenged us to think “outside the plate” and create our own edible containers! Prizes are being awarded to the most creative edible container and filling, so vote on your favorite from April 17th to May 16th at http://thedaringkitchen.com!

Papas Rellenas and Octopus Ceviche for March Daring Cooks

•March 14, 2011 • 21 Comments

This  months Daring Cooks challenge is taking us to Peru. Two classically Peruvian dishes are suggested for us by Kathlyn of Bake Like a Ninja. Papas Rellenas and ceviche.

I learned to make ceviche many years ago and make several versions fairly often. Usually I make it in a more Mexican style. Basically combining fish marinated in lime juice with pico de gallo.  My go to fish is halibut but I have also done it with several types of rockfish, tilapia, and even salmon on occasion. This time though I was looking for an opportunity to use up some octopus from a VERY successful fishing trip last summer.

Yes I used this same photo in my previous blog about grilled octopus and spaghetti with garlic confit. It is one of those days out on the water with my friends that I will remeber for the rest of my days.

Look to that post to see all the details of how the octopus is slow braised. It takes a long time to become tender but is worth being patient. After braising I just cut the tentacle up into small cubes and toss with lime juice. Then to that was added very finely sliced red onion that had been soaked in cold water before draining and adding to the octopus. I took a risk here and went with habanero chile for the heat. This one did not overwhelm.

Then finish off with some cilantro, chopped tomato, green onion, and some sweet corn that was seared off in just a bit of butter to get some color before cooling. I also like to drizzle the ceviche with just a bit of olive oil to balance out all the acid from the lime.

I usually serve this kind of thing with white corn chips. However in Peru it served with boiled and then cooled sweet potato. It is an interesting mix of flavors that I will have to try again. I think that the sweet potato mellows the heat of the habanero. I will do this kind of ceviche again and will be on the lookout for more Alaskan octopus.

Just a little sidenote. I did pour off the excess lime juice and marinating liquids before serving. This is traditionally served alongside of a ceviche and called Leche de Tigre (milk of the tiger). It is said to either be a hangover cure or even be good for the yang. Methinks it is better just tossed out because all that acid is hard on even my iron stomach.

Next up are the Papas Rellenas. These things are impossible not to love. Basically they are a meat filling wrapped in mashed potatoes that are then floured, dipped in eggwash, then breadcrumbs, and deep fried. I cooked up some Arancini for another Daring Cooks challenge and these papas are very similar.

For my take on these I wanted to use some kind of game meat. I thought a friend of mine had given me goat chorizo but it was actually a cajun spiced sausage made from mountain goat. I ended up adding that to sautéed sweet onion, fresno chiles, jalapenos, and garlic.

I also used Alaskan gold potatoes from Vanderwheele farm up in Palmer. They are peeled boiled, and then mashed and cooled. Add in a little egg yolk if you like, season with s&p, and then mix it all together. I just went in for a handful of potato that I shaped into kind of a thick patty. Then spoon in as much filling as you think you can squeeze in there and then gently shape it into the shape of a potato.

Then I put these together like fried chicken. First into flour seasoned with s&p and lots of hot paprika. Next into some beaten eggs seasoned with lots of Frank’s hot sauce. And finally into breadcrumbs that I made in the food processor from toasted baguette. These were all fried up in peanut oil at about 360 F until golden and crunchy.

The relish is actually called salsa criolla. It is a very simple thing. The red onions are again very thinly sliced into half moons and soaked in cold water for 20-30 minutes before they are drained. Then put the onions in with some chiles, I used jalapenos, and season with s&p, some cider vinegar, and the juice of one lime. I was really surprised at just how good that combination of ingredients matched with the papas. If you make papas rellenas then definitely make the salsa criolla.

One more time I am happy to be involved with Daring Cooks. Excellent food is usually the result.

 blog checking lines: Kathlyn of Bake Like a Ninja was our Daring Cooks’ March 2011 hostess. Kathlyn challenges us to make two classic Peruvian dishes: Ceviche de Pescado from “Peruvian Cooking – Basic Recipes” by Annik Franco Barreau. And Papas Rellenas adapted from a home recipe by Kathlyn’s Spanish teacher, Mayra.

Grilled Octopus and Garlic Confit Spaghetti

•March 5, 2011 • 9 Comments

This is really two recipies. One I just learned and one has been in the family for many years. The octopus takes a bit of time but is worth the effort in my opinion. The spaghetti also takes a little time but not only does it taste amazing, it brings a smile to my face everytime I cook it. My Aunt Betty taught me this almost 20 years ago, really before I learned to enjoy cooking so much. I now think of her everytime I cook it.

Flashback to last summer. My friend Greg was generous enough to take some of us fishing out of Valdez. Let’s just say it was a successful trip.

We got into some big halibut, as many black rockfish as we wanted to catch, and that octopus spread out at my feet. Everything else I have cooked many times. Not the case with octopus. Also this one being rather large I knew to do some research before I screwed it up.

After coming across an article by Harold McGee, I figured I was in good hands. He suggests first blanching  and then low temperature braising in the animals own juices to guarantee a tender octopus. So that is what I did. First I blanched a couple of tentacles.

Notice just how much color the water takes on. That was after only blanching for about 4 minutes. I then put the octopus in a pan with a tight lid in a 200 F oven with some ginger, lemongrass, shallots, and a splash of sake.

This was allowed to braise for 4 1/2 hours in the oven. I checked it after 1 hour and it was still really tough. After 4 1/2 hours it was tender but still had some resistance to it. I would compare it to a properly cooked scallop. So one piece was set aside for another meal. The other one became my dinner tonight.

I wanted to do something rather simple so I marinated the tentacle in olive oil, lemon juice, and fresh oregano with a little salt and pepper. While that was marinating, I got started on the other dish. I still remember my Aunt teaching me this dish. First you chop up a bunch of garlic. I suppose you could just drop cloves in olive oil whole and toss them in the oven at a very low temp, but that was not how I was taught.

I was taught to toss the sliced garlic  in a skillet with a generous glug of olive oil.

This is put on the stove at the lowest setting. If you start seeing bubbles it is probably too hot and you should set the pan to the side and allow it to cool. Every 5 minutes or so swirl the pan around and after 20-25 minutes you can start using your fork to smash the garlic. I think I messed with this for about 45 minutes to get it to this stage.

It basically breaks down into amost a paste. I poured off most of the oil and set this pan aside. Regular dried spaghetti goes into a pot of boiling salted water. The octopus gets tossed onto a very hot grill. I flipped the tentacle over after about 2 1/2 minutes and then pulled it off after another 2 1/2 minutes. I treated it kind of like a steak and allowed it to rest while I finished the spaghetti.

When you spaghetti is al dente, pull it out and put into the skillet with the garlic. Be sure to get some of the pasta water in the pan as well. Over heat, incorporate the oil, garlic, a little pasta water, spaghetti,  and some fresh Italian chopped parsley. Season with salt and fresh ground pepper. I then sliced up the grilled octopus and served.

To finish I spooned just a little bit of the reserved garlic oil over the octopus. I also gave it a squeeze of lemon and some more black pepper before tearing in.

This is my favorite kind of cooking. Just a few ingredients that are treated with utmost respect and cooked using proper simple techniques in a manner that really transforms them into something unique. My Aunt would be proud.

Steamed Buns with Roast Pork Belly

•February 25, 2011 • 6 Comments

From the second I first heard about David Chang’s take on pork bao I had to have them. Now I don’t live in NYC. Not even close. So this meal would be left up to me. 

I started by hunting around the internet and looking for recipes. Type Momofuku in a search engine and believe me you will get some results. Most of them talking about the famous pork belly steamed buns. However the lion’s share of these posts have kept the steamed bun recipe to themselves. Lots of photos but no hard info. Even Chang himself suggests you just buy the things from the frozen aisle at your local Asian market. 

 One promising post did show up close to the top of search results. Good ol’ Martha Stewart must have had Chang on her show and was nice enough to post a recipe. Well you may wonder why I am not linking that recipe here. I made her version, although passable, they just weren’t great. I then started discussing with my chef type friends the recipe and was flabbergasted that Martha had done a low standards hack job on the Momofuku recipe as written in his book. That is surprising because she usually does an excellent job of getting the best recipes with all the little details that make them even better.  

 Now while these weren’t all they could be, they were delicious. The flavor combination of the roasted pork belly and the hoisin with a little vinegar bite from the quick made pickles is damn near addictive. So I had to make these again and decided to bite the bullet and buy the Momofuku book. I highly reccommend you do the same.  

So let’s start at the beginning. Start with a pork belly. Whole bellies are about 9 lbs. I suggest just buying a middle piece. My butcher cuts them too small in my opinion. The second one I cooked was about 1.75 lbs before cooking. Season your belly with a 50/50 mix of kosher salt and sugar. Knock off the excess and wrap up tight in some plastic wrap. Store in the fridge overnight. I have come to my own conclusion that doing this for about 12 hours is best. Then the next day either rinse off all the cure or wipe off most of it. A little cure left on the fat side will make a pretty crust.  Chang puts his on high temp first and then turns down to slow roast. I like the results better by slow roasting for 2 1/2 hours at 250F. After a while you can take the opportunity to baste a few times. Then cranking up the temp to 450F for about 20-30 minutes to develop a nice color on your tender as can be belly.  


Isn’t that just a thing of beauty. Resist the urge to tear in here. Let cool to room temp, cover with wrap, and then put in the fridge to cool completely. The reason for this is to allow for perfect slicing. The slices can be re-heated in a pan or if you plan on using the whole belly just toss the whole thing back in the oven to gently rewarm. (after slicing)

 I used my own recipe for a quick pickle. I just tossed a couple of sliced up cucumbers in a quart mason jar with a brine of rice vinegar, water, chile flakes, sugar, and a little mirin. These can be used after just an hour but are best if allowed to sit overnight.


 Now for the all important buns. Martha, pay close attention. In a bowl, preferably your KitchenAid, put in the following:

  • 1  1/2 cups warm water
  • 4 tsps active dry yeast
  • 3 Tbsps nonfat dry milk powder
  • 6 Tbsps sugar
  • 1 Tbsp kosher salt
  • 1/2 heaping tsp baking powder
  • 1/2 tsp baking soda
  • 4 1/2 cups of bread flour ( I used ’00’ with excellent results )

Now turn the mixer on slow and as the dough starts coming together, drizzle in 1/2 cup of lard. You have to warm it up a bit to make it a liquid but don’t make it hot. You can use shortening but lard is so much better. (in every use)

Mix on slow for about 10 minutes. My KA started complaining at about 8 so just use your own judgement. It should be a smooth dough. I pulled out the dough hook, shaped the dough into a ball, and put back into the mixer for the first rise. Keep in a warm spot. My kitchen in Feb. is a little tough so I set on the stove while the oven was still warm from the pork belly. Allow the dough to double in size.

Turn out onto your work surface. Cut in half, then cut each half into 5 pieces, roll those into short logs, cut those logs into 5 equal pieces. I actually only did this for half making 25 buns. The other half I made into a ball and froze with the intention of doing more when I need them.

Roll your small pieces into balls about the size of a golf ball and put on a sheet pan lined with parchment. Cover with plastic wrap and allow to rise/rest for 30 minutes or so. Take this time to cut out enough small squares of parchment. One for each bun about 3″x4″. Take each ball and roll out into a small oval. Not too thin. Keep in mind the size of your pork belly slices as a guide here. Then gently fold the oval in half. Again cover with plastic wrap and allow to rise for another 30-60 min.

All the hard work is done. Now comes the easy and fun parts. Put the buns on parchment squares in your steamer in batches. I went out and bought a bamboo steamer for this because I think they work better for items like this.

Steam for 10 minutes and viola, perfect steam buns from scratch.

Now assemble. Gently open up a bun and slather with hoisin sauce. Put on a couple pickles and as many slices of pork belly as you can squeeze in. Finish with some chopped green onion and sriracha if you like the spice. So easy that David Chang can do it while drunk as a skunk.

I ate every one on that plate and went back for more around 11pm. These are some of the finest beer drinking snacks I have ever come across.

Notice how much puffier these are than Martha’s version up top?

I am not one of those cooks that has an extensive cookbook collection. For the most part I try to find information online. However, on certain occasions, buying the book is worth every penny. I highly reccommend Momofuku be added to your collection. Cheers!

February Daring Cooks, Soba and Tempura

•February 14, 2011 • 17 Comments

The February 2011 Daring Cooks’ challenge was hosted by Lisa of Blueberry Girl. She challenged Daring Cooks to make Hiyashi Soba and Tempura. She has various sources for her challenge including japanesefood.about.com, pinkbites.com, and itsybitsyfoodies.com.

I love Japanese food. So when I read the challenge I was excited to get started. Tempura is something I have done quite often. The cold soba noodle salad was another story. A little tempura while thinking over the soba was in order.  

This was done with a batter made of chilled soda water, 2/3 cup AP flour, and 1/3 cup of cornstarch.  A trick I use to keep the batter cold is to put a few ice cubes in the batter. Deep fried mushrooms are an old favorite of mine so I did those along with shrimp and sweet onion rings. I made a dipping sauce of soy, chiles, green onion, mirin, and sesame oil. Delicious.

Now that I had gotten my fix of mushrooms, I wanted to try out the rest of the challenge. This time I pulled together the buckwheat soba noodles along with more tempura, ahi poke, and wakame salad.

This time I put together the boiled and then rinsed and chilled soba noodles with a simple dipping sauce. The sauce was made from bonito dashi stock, soy, and mirin. Instead of dipping I basically dressed the cold noodles. As simple as this sounds, it was really good and I will do this again for quick snacks.

To go along with this simple noodle bowl, I wanted to keep clean and fresh flavors that would compliment the salad. Spicy Ahi poke salad is a simple and delicious preparation of raw ahi that will impress any fan of sushi. Take good quality fresh Ahi, cut into cubes, and dress with some soy, sesame oil, toasted sesame seeds, green onion, and a bit of chile garlic sauce for heat. I also tossed in some chopped up bits of wakame. You could also use small pieces of nori.

The whole meal was rounded out with some wakame (seaweed salad) that I got from my favorite Asian grocer and zucchini and green bean tempura for a little crunch.

Not a bad Japanese meal considering it was prepared by an Illinois born and Alaska raised bachelor.

Be sure to check out the other Daring Cooks posts.

Vietnamese Fish Curry

•February 8, 2011 • 3 Comments

Ok so maybe I should call it Alaskan fish curry since their were no Vietnamese people involved in the cooking of this curry. Well actually there were a couple when it came to the inspiration. Ray’s Place is a great little local Vietnamese place that I enjoy more every time I go there.

Last week I was there with my friend Duke and torn between ordering the lamb or the halibut curry. That day I went with the lamb and it was outstanding. But since then I have been craving some halibut curry.

As with most Asian cooking, the lion’s share of the work is done in prep. I put together the mis en place.

This is the base for the curry. It is 3 shallots, 2 green onions, 2 Fresno red chiles, 3 cloves garlic, grated ginger, 2 stalks of lemongrass, 3 Thai dried red chiles, cinnamon, coriander seed, and fennel seed. The dried spices were all ground up in a spice grinder. This was fried in a bit of peanut oil in my cast iron wok. I wanted this spicy so I also tossed in some chile garlic sauce. Oh and I have been hearing about the health benefits of tumeric so I tossed in some of that too.

After about 3 minutes this will start to smell amazing. Don’t be pulled in too far though. If you lean in for a smell it will be like taking a big whiff from a can of bear spray. After this takes on a little darker color, add in about a half cup of water and a can of coconut milk.

Now put in about 3 thinly sliced kaffir lime leaves that have had the stem removed. I also put in about 5 star anise and a couple of tablespoons of fish sauce. This mix is put on medium heat and allowed to reduce by about half. The water you add allows a longer simmering time so that more of the flavors can be extracted into your curry base. Now is also the time to taste and season. I wanted a balance of sweet and hot so I added in some palm sugar, salt, and pepper.

Once reduced, add in about 2 lbs of fish or shrimp and whatever veggies you want. I used halibut and sweet snap peas.

Stir this to incorporate  and cover. I turned down the heat and let the fish gently poach in the curry sauce for about 6 minutes. Just stick a fork in a cube of fish to see that it is cooked through and pull off the heat. At this point toss in a bunch of chopped Thai basil, some cilantro, and maybe add a squeeze of lime juice.

I served with brown rice but white rice is also good. The final dish is dressed with a bit more of the fresh red chile, Thai basil, and cilantro.

This really hit the spot. I had a chill all day until I ate this. Spicy food makes winter seem shorter. J/S

Cassoulet, January Daring Cooks

•January 13, 2011 • 23 Comments

Our January 2011 Challenge comes from Jenni of The Gingered Whisk and Lisa from Parsley, Sage, Desserts, and Line Drives. They have challenged the Daring Cooks to learn how to make a confit and use it within the traditional French dish of Cassoulet. They have chosen a traditional recipe from Anthony Bourdain and Michael Ruhlman.

Lisa and I have been friends long distance for quite some time. I am thinking that it has probably been since 2005. Brought together in a long since abandoned, then relocated group of chefs, cooks, bakers, and loudmouth misfits that now meet here on Facebook (group is now private, contact me on my fb profile). I will warn you, we speak our minds. The old group motto was “If you can’t stand the heat, then get out of the kitchen!” So when I saw that Lisa was co-hosting the challenge I knew it would be good.

Cassoulet is a dish that I have done twice before. It is classic French peasant food that can be made of leftovers and beans to stretch them out, or in a very high end way that elevates the dish to truly elegant. On previous attempts I did all the hard work of making my own duck confit and using traditional ingredients such as pork belly, fresh herbs, and slow soaked white beans. My only shortcut was the sausage. Cassoulet traditionally uses a garlic flavored pork sausage from the area of Toulouse. I got started on this month’s challenge by making my own sausage.

A 7 pound boneless pork butt and 1 pound of pancetta get cut into cubes. I also put together the spices based on this recipe.

I didn’t follow the recipe exactly, but did use the same blend of spices which were sea salt, sugar, 4 peppercorn blend, fresh grated nutmeg, and about 4 cloves of garlic. I blended the spices in with the cubed meat and set in a metal bowl out my front door. The temp was about 7 deg F. So even with the salt and sugar, the meat started to freeze within about an hour. The chilled meat was then run through my KitchenAid food grinder using the course die.

Into this gets mixed a bit of dry white wine. Then everything is mixed by hand taking care not to mash everything together. This is covered tight and allowed to sit overnight in the refrigerator. I did a quick test after adding the wine to test the spices. It is so good. You wouldn’t think that so few spices and in such small amounts could flavor so much pork. After sitting overnight, these were put into hog casings.

Now on to the duck confit. In the past I have done my confit sous vide to get around the issue of not enough duck fat can be rendered from one duck to confit the legs. This time I wanted to do it traditionally. I butchered two ducks. They were broken down into breasts, leg and thigh quarters, and the carcass. I also utilized 4 additional duck breasts with the skin and fat on. All breast were stripped of skin and fat. Every ounce of skin and fat except from the leg/thigh quarters was then slowly rendered in a bit of water. When the water simmered out, the skin starts to fry in the duck fat and leaves you the most beautiful duck crackling you could imagine.

 The leg/thighs were then salted heavily with the addition of sliced garlic and some fresh thyme. These sit overnight in the fridge.

These get rinsed and dried thoroughly. Then packed tight into the smallest container possible.  That golden delicious duck fat is then melted and poured over the top of the legs to cover.

I put this in the oven at 225F for about 5 hours. Basically you slow poach the pieces in their own fat until they are melt in your mouth tender. The easiest way to test for this without actually ripping a leg out and biting in is to poke a bamboo skewer into the meat. If it slides in with little resistance then your confit is done. 

Now for the cassoulet. I made two different versions because I still had ideas floating around. The first one was to be served on New Years Day. Hangover food. It starts with soaking great northern beans overnight. Then drain and recover with water. I added pork belly, carrot, celery,onion, tarragon, savory, rosemary, bay leaves, pepper, and salt to the beans. They were gently simmered until just done. Think al dente.

Everything is removed from the cooked beans. Save the liquid and the pork belly. I cut the belly pieces into small cubes and then fried them. This was to render out as much fat as possible and to also crisp up the meat. These became my base layer.

I then sauteed some mirepoix in just a bit of the pork fat. That along with some tomatoes, fresh tarragon, savory, and thyme were mixed with the beans and some browned Toulouse style sausage.  Everything gets put into the clay casserole and then your reserved bean cooking liquid gets ladeled in to moisten. You can layer it all in neatly or just mix it all together.


I did put the duck legs in whole in this version. Then more bean mixture and topped it all with bread crumbs that were tossed with green onions and butter. Bake it all at 375F until you can’t wait any longer. I like to pull it out every 30 minutes or so and break the crust with the back of a spoon. This has the effect of incorporating some of the crust into the casserole. It is best to then let this thing sit overnight in the fridge. You can the reheat the next day. 

My family wasn’t familiar with this dish. So they weren’t quite sure who would go first. My cousin’s boyfriend jumped in first and then it was on. This huge pot of food was gone in 24 hours. 

After all this work, I still wanted to experiment some with the recipe. I had saved a duck quarter that had been aging for about 10 days in the fridge. I also had made a duck and cognac sausage from all the breast meat that was smoked at my uncle’s house on New Years Day. 

This time was going to be heavy on the pork and duck. I browned up some more Toulouse sausage and the last remaining smoked duck sausage link.

I also tossed in pieces of these amazing smoked pork chops that my butcher makes in house. 

This time I took all the meat off the bone of the chops and the duck confit.   Tossed it all in a dish an baked with a breadcrumb crust.

At the end of baking though, I went with something that could put even this dish over the top. Remember those duck cracklin’ from earlier? Yes I did. 

I just wasn’t satisfied with the breadcrumb crust. It didn’t provide enough textural contrast. So I tossed on some skin rendered in fat. The flavor and the texture it added were out of this world.  It is one of those treasures handed to you in the process of making this dish anyway, why not use it. 

Thank you to Lisa and Jenni. Be sure to check out the other Daring Cooks to see everyone elses take on Cassoulet.